• Skip to primary navigation
  • Skip to main content
  • Skip to primary sidebar

Treasured Tips

  • Home
  • About
  • My E-Book
  • DIY
    • Natural Alternatives
    • All Natural Beauty Care
    • Natural Skin Care
    • Natural Hair Care
  • Recipes
    • Snacks and Side Dishes
    • Paleo Recipes
    • Gluten Free Recipes
    • Healthy Drinks
  • Navigation Menu: Social Icons

    • Facebook
    • Instagram
    • Pinterest
    • Twitter
    • YouTube
Home » Sprouting » How to Sprout Broccoli Seeds

How to Sprout Broccoli Seeds

Published September 4, 2012 Last Updated April 2, 2019 By Lori Ryman Leave a Comment

818 shares
  • Share
  • Tweet
  • Email

This post may contain affiliate links. Please read my disclosure.

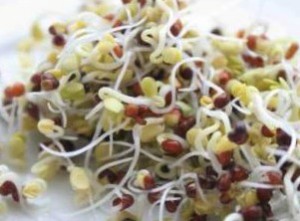
Easy steps on how to sprout broccoli seeds!

Broccoli seeds are very easy to sprout in your own kitchen. All you need is a container and the seeds!

How to sprout broccoli seeds

 Broccoli sprouts are extremely beneficial for your health! Broccoli sprouts contain 10 to 100 times the amount of cancer fighter compounds than mature broccoli.One compound in particular is sulforaphane, which is anti-cancer and antimicrobial. Sulforaphane in broccoli is reduced up to 90% when broccoli is cooked. 

Not only do broccoli sprouts contain cancer fighter compounds, they also boost your immune system and increase antioxidant activity. Broccoli sprouts contain a high level of antioxidants such as vitamin A, C and E. All of which boost the immune system and reduce the amount of free-radicals in our bodies.

Make sure you use organic broccoli seeds for even more health benefits!


Steps:

1. Choose a container to use. A glass jar works great.

(Optional: cover the jar with a piece of cloth while allowing the sprouts to get air. The sprouts can grow with no covering too)

2. Put your broccoli seeds in the jar. ( A couple tablespoons of seeds depending on the size of your jar)

3. Pour water into the jar with seeds and allow them to soak for 8 hours.

4. After 8 hours remove the water and rinse the seeds. Continue to rinse the seeds 2 times a day.

5. In 5 to 7 days your sprouts will be ready to eat!

818 shares
  • Share
  • Tweet
  • Email

Filed Under: Sprouting

About Lori Ryman

Lori Ryman, BS, MS, has been dedicated to researching natural alternatives for the past 15 years. Lori has a background in research methods, health, and nutrition. She started with an Interest in natural alternatives to improve her own health and she continues to share natural DIY projects, recipes and natural alternatives with millions of viewers on treasuredtips.com.

Lori’s research for posts is based on peer reviewed evidenced-based research. Lori is a published author in a peer reviewed research journal. Her work has been covered by MSN, The Huffington Post, wikiHow, The New York Times, and many more.

Sign Up for My FREE Weekly Newsletter!

Plus get my FREE Real Food & Gluten Free 7 Day Meal Plan

Previous Post: « Paleo Chocolate Chip Cookies Recipe
Next Post: Walnut Hair Dye, How to color your hair with black walnut powder »

Reader Interactions

Leave a Reply Cancel reply

Your email address will not be published. Required fields are marked *

Recipe Rating


Primary Sidebar

Hi! Nice to meet you

I'm Lori. I love living a natural lifestyle, DIY projects, and trying out new healthy recipes. Read More…

Popular Posts

coffee scrub in jar with coffee beans

Homemade Coffee Scrub for Cellulite

Chocolate chip muffins in muffin pan with text overlay - paleo chocolate chip muffins

Paleo Chocolate Chip Muffins – made with coconut flour

House with backyard and deck with potted plants and planted plants

5 Plants that Repel Mosquitoes

Plate with three slices of oven fried chicken

Paleo Oven Fried Chicken

dry shampoo in jars with brush with text overlay - natural diy dry shampoo for light and dark hair

Natural DIY Dry Shampoo for Light and Dark Hair

Here's How I Use Tea Tree Oil for Acne - Prevent new breakouts and treat breakouts

How to Use Tea Tree Oil for Acne

Copyright © 2023 · Contact Me

· Privacy Policy