This post may contain affiliate links. Please read my disclosure.
Are you a shower person or a bath person? I love baths, but I haven’t had the time the past few months and I really missed them, they are so relaxing! This past week though, I caught some type of virus, so I took a bath every night to reap the benefits of Epsom salts, which help detoxify, boost the immune system, relieve aches and increase magnesium. In addition to adding Epsom salts to my baths, I also like to add a little baking soda, coconut oil, and essential oils for the benefits. What’s the perfect way to add all these fantastic ingredients to your bath? A great bath bomb! They are very popular lately and they sound very cool, like something you would get at an upscale spa. But you can make your own with this bath bomb recipe, which includes all the beneficial ingredients I mentioned above!
Beneficial Ingredients in my Bath Bomb Recipe
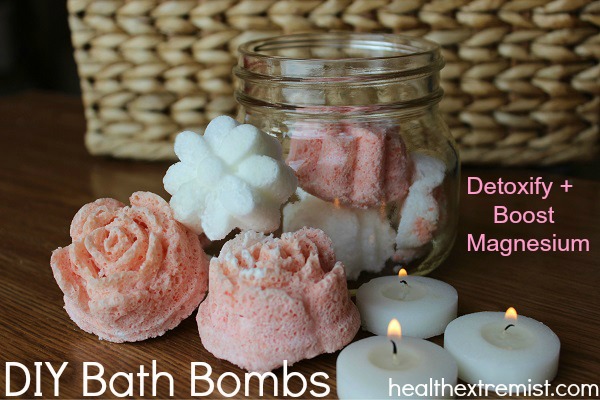
This bath bomb recipe combines all of the beneficial ingredients into one fizzy ball. I love to keep them in a glass mason jar next to my tub, so when I’m ready for a relaxing bath, all I need to do is throw one in.
So you may be wondering what’s in these bath bombs, the primary ingredients are baking soda, Epsom salts, citric acid, and coconut oil. Here’s each ingredient with it’s benefits:
Baking Soda– I love to add some baking soda to my bath because it aids in drawing out toxins from your body. Not only does it remove toxins, it also aids in alkalizing your body, helps treat common skin problems, hemorrhoids and yeast infections.
Epsom Salts– Many people are deficient in magnesium and Epsom salt baths are a great way to increase magnesium levels! When you bathe in Epsom salts, the magnesium and sulfates are absorbed in the skin, pulling out harmful toxins from your body! Some of the health benefits of magnesium include; fighting inflammation, increasing blood flow and improving oxygenation in your body. Just some of the conditions Epsom salt baths help are; sprains and bruises, athlete’s foot, toenail fungus and gout.
Coconut Oil– There are so many benefits of coconut oil, that’s why I included it as an ingredient in my bath bomb recipe! You can get many health benefits by adding it to your bath. Not only does it help your body by improving your immune system, in the bath it helps moisturize and smooth your skin. It is also very soothing and healing for many skin conditions such as eczema and acne!
Citric Acid/ Cream of Tartar– For this bath bomb recipe I use citric acid, but I read that many use cream of tartar in place of this ingredient and it works just as well. Citric acid gives the bomb it’s fizzies and it is often used as a food additive. It is a natural acid that is found in fruits and vegetables such as lemons and it is what gives fruits or candies a sour taste.
Optional Ingredients:
Essential Oils– I added lavender oil to this bath bomb recipe because it is a soothing oil as it’s aroma helps combat stress and anxiety. Many people spray a mist of lavender oil on their pillows to help them fall asleep.
Food Coloring– Without any food coloring these bath bombs are a nice bright white color. You can add beet juice to the mixture or a few drops of natural food coloring to get any color you would like.
Easy and Save Time
Not only is this bath bomb recipe easy to make, but it saves the hassle of adding all of these separate ingredients to your bath each time you want to take one.
When you’re ready for your bath all you need to do is pop one of these bath bombs into your tub, watch it fizz and hop in. They are such a time saver!
Here’s what you’ll need to make the bath bombs:
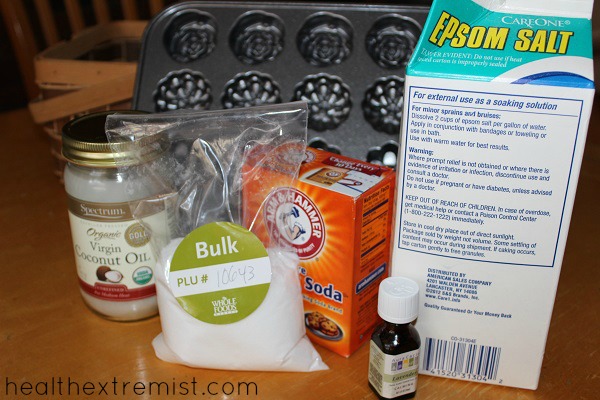
Bath Bomb Recipe
Ingredients:
- 1 cup Baking Soda
- 1/2 cup Epsom Salts
- 1/2 cup Citric Acid
- 2 tablespoons Coconut Oil
- 3 teaspoons Water
- (optional) 4-5 drops of Essential Oil (I used lavender oil)
- (optional) 1/2 teaspoon of Beet Juice or few drops of Natural Food Coloring
Directions:
1. Mix all dry ingredients in a bowl.
2. Mix all wet ingredients in a separate container.
3. Slowly add the wet ingredients to the dry while stirring. You may see it fizz a little when they begin to mix, but that’s okay just keep stirring. Once they are fully mixed, the mixture should feel like damp sand.
4. Optional: add in beet juice/natural food coloring and mix well.
5. You’ll need something to form the bath bomb in such as a mold. I used a muffin pan that had pretty flower shapes. Once you have your mold, add a few drops of olive oil to each individual muffin molds and rub it around the area. This will allow the bombs to come out easier. (I tried using coconut oil on some of them, but what a mess! I couldn’t get them out.)
6. Add the bath bomb mixture to the muffin pan and press in firmly. The bombs will expand, so don’t fill each muffin area to the top.
7. Leave out at room temperature for at least 3 hours or until dry/hard to touch. Depending on their size, you may need to leave them out overnight.
Have fun making this bath bomb recipe and enjoy your bath bombs!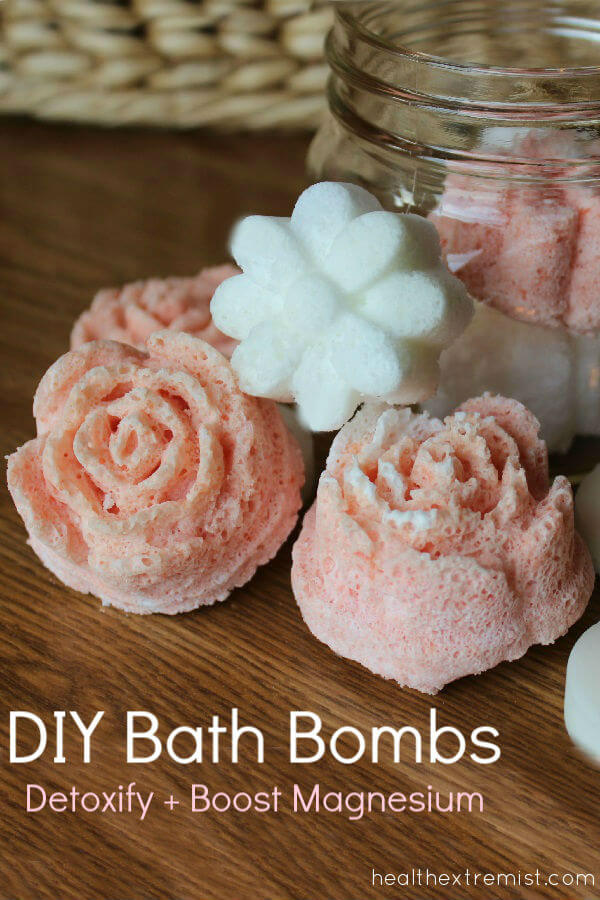
Hi there,
Im from the netherlands and i have a question?
Is this recipe only for making bathbombs with a pressor?
And is it possible to use a combinatie of citric acid and cream of tar tar?
Greetz from the netherlands
I didn’t use a presser. Just something to shape them in. You could just use your hands to shape them into balls instead. I haven’t tried it with cream of tartar.
Do you need to use baking soda in the bath bombs?
Yes you do 🙂
I made 2 batches. The first one didn’t stay in shape and turned into one big sheet of stuff. Still damp, so i scratched it off the plate and now they will be fuzzy bath salts. Fizzy, not fuzzy… :-). The second batch, perfect. We just formed balls, no molds used. Thanks for sharing the recipe. Conversions into metric can easily be found on the net btw.
Awesome!
Is bicararb the same as baking soda please?
Yes, bicarbonate of soda is the same thing.
I have tried other recipes similar to this one and have found that the baking soda absorbs the smell of the essential oils. Does this happen to you? I’ve seen a couple recipes that say to add up to 15 drops of EO. That seems like an extreme amount. Can you really get the aromatherapy from just 4-5 drops?
Also have you ever used a closed mold (ball or egg mold) to create these? I am just using some Easter Eggs and I am having a heck of a time figuring out how to keep them from overflowing while they dry.
I think 4 to 5 drops is enough. I am sensitive to scents and essential oils can be very powerful. So I like to use a small amount at a time.
So true!!
Hi I’m having so much trouble with bath bombs. I’ve had 4 attempts they have all cracked around the seam and the last batch cracks were every where. They also fizz for appox 30 seconds. About to give up !!!
Thanks
Sorry you’re having trouble. Is there anything you changed?
Too ouch liquid.
Hi! I am trying to make some bath balls for Christmas presents but am having a very hard time finding fine grain Epsom salts, even on Amazon. I can find Dead Sea salt fine grain but I hear it’s not the same. Where can I find them?
-thanks for your time 🙂
Do you have a local health food store you can check?
Bulk Apothecary!
I just used your recipe, and they turned out amazing! I was going to use an ornament mold, but it kept rising, so I used the muffin pan. I hope that’s normal, because I had to cut the tops off and smooth it back down into the pan a few times. Overall though, I loved this recipe. The small amount I had left over- maybe a half teaspoon- fizzled a lot when I put it in a small glass of water! Very excited to try it in the tub!!! 🙂 I doubled the recipe too, and was able to make 22 full muffin tin bombs.
So happy it turned out well. Thanks for sharing your results 🙂
I also followed the exact recipe and left them out to dry overnight but they still haven’t hardened, the consistency is like marshmallows. I’m so unhappy! I am wondering if there is too much coconut oil in there at 2 tablespoons.
Sorry to hear that. I’m not sure why they wouldn’t have hardened.
If it’s high humidity where you are then that’s expected. Cut the liquid in half or 1/3..
It says to mix wet ingredients together, besides coconut oil what other wet ingredients are there? Am I missing something? Thanks!
Just the essential oil, and if you want them colored, the beet juice.
Mine never hardened 🙁 I followed the recipe on the dot and left them even overnight at the room temperature. They were marshmallow consistency still. So sad 🙁
Sorry to hear that. I wonder why they didn’t harden..did you change any ingredients?
No, I used all the same ingredients and they were fresh (I bought them for these). I’ll try again 🙂
Hmm..the only other things I can think of are the temperature of the room or if you’re at a high elevation. Wish I could be more helpful!
Hello! I just want to say I love this recipie, but I wad wondering whether it would still work if I were to put them in something like Easter egg molds. Would they still work if the air can’t get it?
Yes they should work in any molds.
how many does this recipe tend to make with your flower muffin tin?
About 12 or so.
Love this! How many does this recipe make?? 🙂
It made about 12 to 14.
Would we need a preservative when using natural food dye in the salt?
Hmm..it may depend on the ingredients in the food dye. I think they generally have natural preservatives in them already.
Hi,
Great tutorial, just wondering if I substitute the citric acid for the cream of tartar would you keep the same amount?
Thanks
I would think so
How many bath bombs does one recipe make? Assuming I fill the molds halfway to allow for expansion.
I think I made about 10-12.
Hi,
Can you give me metric measurements as weights in cups doesn’t help? It differs depending on what you are weighing
I’m not sure of the metric measurements. You can probably find the conversion online. 🙂
I was just curious what site Lisa had or if that was a private thing? I am signing up for your newsletter now. I really enjoyed it Thanks Julie H.
I’m not sure. If you hit reply under her comment, she will get notified that someone replied to her and maybe she’ll come back to share it 🙂
If I used your recipe without the citric acid would I still keep the measurements of the other ingredients the same & would it still turn out just as good?
I don’t think it would have the same effect without the citric acid.
Is citric acid necessary for bath bombs?
It is if you want to get the ‘fizzing’ effect. 🙂
Hi, I am planning on making bath bombs for a Christmas craft fair I was wondering how long they will keep their shape?
I’m not sure exactly how long they’ll last. But, the longest I’ve kept some of mine is a few months and still looked and worked great.
Mine were not dry after a few hours and I had to travel with them, so I covered them in Saran wrap. Big mistake! They started foaming and expanding again. Hope they still fizz when we use them!
They should still come out good. Depending on the size and room temp they may take longer to dry. I made some this winter and they took forever to dry. I think it may be affected by the cold temps here.
They didn’t fizz :(. Trying this again today!
hi lori. i have been researching diy bath bombs and it is so hard to decide which recipe to use. BUT i am going to try yours. i just need clarification on how long to leave the mixture in the mold. Until it dries/hardens and then take out of the mold? one other question: i am leary of using any type of food coloring as i do NOT want to stain my tub… i have read mixed facts on this and wondered if you know? i may just keep the food coloring out.. or just give them as gifts but selfishly keep them color free for me. haha thank you. happy new year!
Happy New Year to you too! I let them sit in the mold for about 2 to 3 hours. You can feel them harden up as they take shape. You can definitely keep them color free, they still look really cute! I used the beet juice and it didn’t stain my tub.
Thank you for such great and easy recipe. I’m waiting for mine bath bombs to dry.
Hope they came out good 🙂
I have been experimenting with bath bombs lately and have used your recipe. I did one batch with citric acid and the other with cream of tartar. I haven’t used them yet as they are still drying. However, my question is about the expansion. I found that when I use citric acid, the molds (muffin cups) overflowed. How much would you say to put in whatever mold you are using? Half? I’m just not sure how much they expand. When I use cream of tartar, there is no expansion and everything stays put perfectly, but I’m not sure I’m going to get the fizz out of the ones with cream of tartar. Any thoughts on how much we should fill molds to allow for proper expansion? Thanks for this great recipe!
Yes, that happened to me too! I only filled the molds about half way because they expanded so much.
If you are getting expansion.. Your mixture has reacted already. Try witch hazel instead of water and use alcohol sprtiz to help bind the powders.
If it has too much liquid will it still work? Will it just have to sit longer?
Maybe just let it sit in the container longer to harden or you could add some more of the baking soda/or epsom salt and stir it up again.
Please note that the author’s recipe is only good for pressed Bath jambs.,not the round 2 sided mold.
why won’t this work in the round 2 sided mold? i want to use this recipe but the only molds I have, are the round 2 sided mold
I want to try these! Question, it’s hot right now so my coconut oil is in liquid form…do I need to cool it so it will harden first? I guess I don’t know if it’s a dry or wet ingredient. (-; Thanks!
Liquid is perfect! In general, coconut oil should always be measured when it’s melted. For this recipe, I heated it a little to bring it to a liquid.
I just found your site through Pinterest and I sure am enjoying looking around and reading through your posts! We have a lot of things in common! I am an essential oils nut along with fermenting and clean eating….so many great things to stay healthy and strong. Thanks for creating such a great space here. Lisa~
Hi Lisa, thanks for stopping by! Can’t wait to check out your site. 🙂
i love this idea, but my only concern is that the bath may get clogged with the coconut oil (which i use a lot generally) – do you have any problems with blocked drainage when using this? do you methods other than the baking soda/vinegar mix to unclog sinks/baths ? (which for me doesn’t work 100%….) thanks!
I have never had a problem with the coconut oil clogging my bath before. I think since it is a small amount it should be fine.
Can I use fresh lemon juice for my citric acid
Sure
Also, coconut oil mostly starts out as a solid but liquifies at room temperature. It should run down your drain without any problems.
I replace the coconut oil with almond oil and never have any problems. I use coconut oil for many other things and it has never clogged my drains either.
Hydrogenation
RBD coconut oil can be processed further into partially or fully hydrogenated oil to increase its melting point. Since virgin and RBD coconut oils melt at 24 °C (76 °F), foods containing coconut oil tend to melt in warm climates. A higher melting point is desirable in these warm climates, so the oil is hydrogenated. The melting point of hydrogenated coconut oil is 36–40 °C (97–104 °F)
source: https://en.wikipedia.org/wiki/Coconut_oil
It melts at 97-104F. Just run hot water down the drain if you are really concerned. Your bath water is probably that temperature anyway……
Lye works well for clogged drains.
I destroyed my drain pipe using lye. Idon’t Recommend it.
Very interesting information. When you detox with the Bath Bombs, do the toxins come out through your skin? Can this cause acne? Thank you for your wealth of knowledge.
The toxins do get released through the skin, but it has never caused breakouts for me. It always improves my skin! 🙂
Absolutely it can cause acne. Release of toxins may cause any skin condition such as hives as well. Our skin is our largest organ of our body , and toxins released that way before through bowels or urine.
This is a great recipie that i tecomend so don’t be so pessimistic, it actually doesn’t cause breakouts and is clarifying for the skin. Do a little research before opening your mouth.
no it doesnt I did this for a group project and no it doesnt unless you are allergic to one of these items